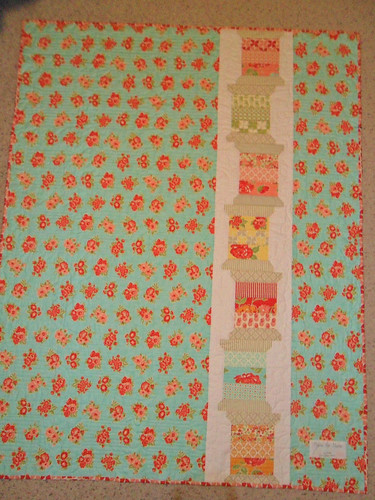
After finding out that some close friends of ours were expecting a baby girl, I knew I had to get to work on making her a quilt. (Because I want her to have one and because I know I will have to finish it before Collin is born.) I knew I wanted to use the
Skittles pattern by Kate Conklin Designs. After being told their nursery would be centered around anything pink, I went searching for fabric. One day last week, I took P to the quilt shop with me while I was looking for fabrics for this quilt. I setteled on Vintage Modern by Bonnie and Camille and chose three gray prints and three pink prints. I paired it with Kona Snow which was the perfect match!
Here is a bad cell phone picture from before I basted it. (Not a good idea to be 36 weeks pregnant and crawling on the floor!)
The quilt top was easy to make. It only took me a day. I decided to make the quilt top a little longer and added a 1.5" (1" finished) section between each row. Since I made the top, I have been out of town and I am just getting back to work on it. Today I had a new adventure. As usual, I used my walking foot for the quilting. However, I decided to use the guide bar that came with it rather than tape to make the straight lines. About a quarter of the way through, the entire bar fell off. Obviously this did not make a very straight or accurate line. I ended up "unquilting" the entire thing. :( I wanted to be happy with the results of the quilt and I knew I would not be happy with a very crooked line. The photo below shows where I was taking out the stitches.
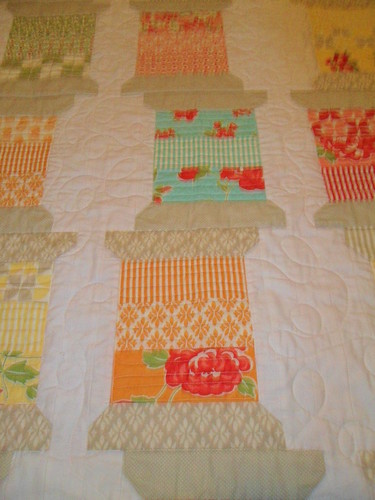
Because the blocks finished up at almost 12" wide, I was able to quilt three lines about three inches apart. I also quilted down the center of the 1" sections I added and then on either side of these sections.
I am not crazy about the quilting through the middle of the sections but it was the first part I did. I am hoping it will look better after it is washed. It just looks quite indented to me right now. Overall, I am very happy with the quilting.
Now I am off to make true bias binding using a print from Ruby by Bonnie and Camille so I can get it attached and the quilt sent on its way. :)